Washing Machine Leaking? Find the Source Before It Reaches the Floor Below
A washing machine leaking water onto the floor can damage hardwood, laminate, tile grout, subfloor material and the ceiling below, sometimes within hours. The source is not always the washer itself. Water can come from a supply hose, a drain hose, the standpipe connection, a household valve, an internal pump seal, a tub gasket, a door boot, a detergent dispenser or an external plumbing coincidence that has nothing to do with the appliance.
Identifying where the water first appears, when it appears and what cycle stage the washer is in narrows the diagnosis faster than removing parts. The right information also determines whether you need an appliance technician, a plumber or both.
For help arranging washing machine leak diagnosis in Staten Island, tell us the brand, model number, front-load or top-load, where the water appears and what cycle was running. Appointment availability, the business handling the visit, diagnostic terms and repair scope should be confirmed before the appointment.
Request Washer Service
Stop and Protect: What to Do Before Investigating
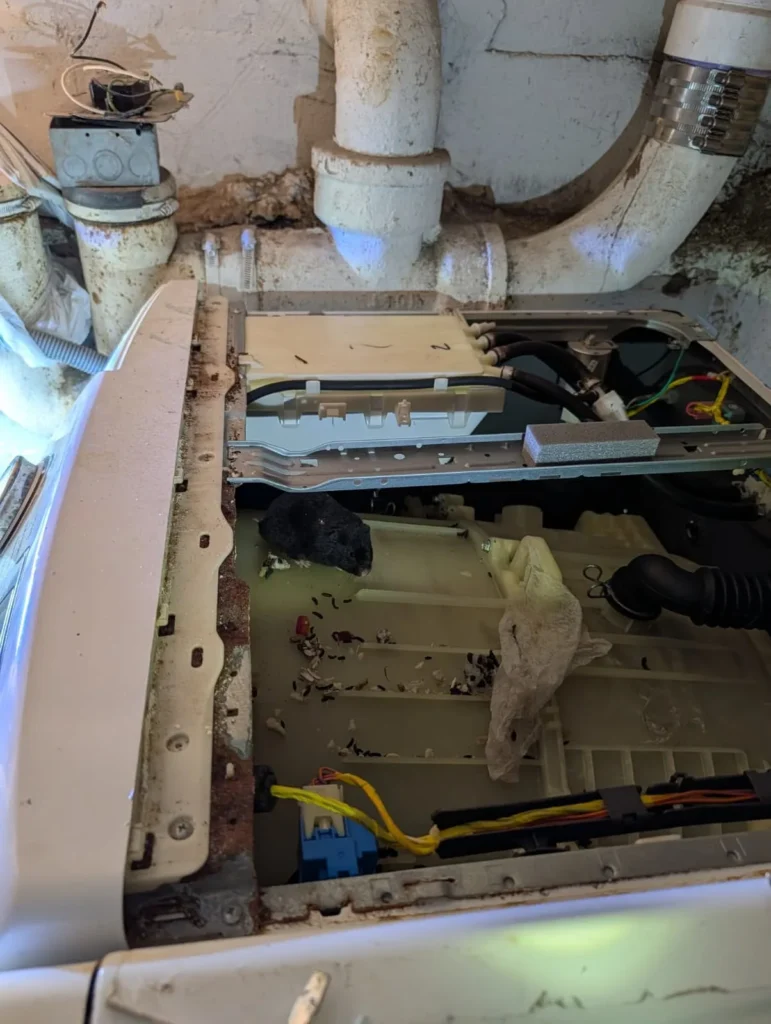
A washing machine uses large volumes of water under pressure and through motorized cycles. Act in this order before looking for the source.
- Check for electrical danger. If water has reached the power cord, outlet or any wiring, do not step into it or touch the washer. Turn off the circuit at the breaker panel if you can do so safely. Get qualified electrical help.
- Stop the cycle. Press cancel or pause. If the washer does not respond, turn it off at the control or the breaker. Do not open the door on a front-load washer with water inside; it may be above the door seal.
- Turn off the water supply. Close both the hot and cold supply valves on the wall behind the washer. If the valves are hard to reach, corroded or will not turn, do not force them. A valve that breaks under pressure will flood the space.
- Contain the water. Place towels around the base and use a shallow pan, mop or wet vacuum. If the laundry is above a finished space, check the ceiling below for dripping.
- Protect belongings. Move items on the floor away from the water. Move nearby electronics, documents or anything that absorbs moisture.
- Photograph the scene. Record where the water appears, how much, the connection area behind the washer, the floor condition and the drain hose path before you clean up.
Do not pull the washer out until both supply valves are closed and the power is disconnected. Supply hoses under pressure can burst if stressed, and a water-line failure behind a running washer can release hundreds of gallons.
Washing Machine Leaking: Where Is the Water Coming From?
The location and timing of the water narrow the source. These observations help define the diagnostic path, but none confirms a failed component by itself.
| Where and when the water appears | Safe clues to record | Possible sources to evaluate |
|---|---|---|
| Behind the washer, constant drip even when off | Visible supply hoses, valve area, wall fittings | Hot or cold supply hose, valve, wall connection, household plumbing |
| Behind the washer, only during fill | Supply hose connection tightness, filter screen, valve area | Supply hose fitting, inlet-valve seal, burst hose |
| Under the front during wash cycle | Suds level, detergent type and amount, door boot or tub seal | Oversudsing, door boot tear, front panel seal, tub-to-pump connection |
| Under the front during drain or spin | Drain hose connection, pump area, hose clamps | Drain pump seal, pump-to-hose connection, cracked hose, drain hose |
| At the standpipe or wall drain | Standpipe overflow, hose insertion depth, drain speed | Household drain clog, undersized standpipe, hose too deep |
| At or near the detergent dispenser | Dispenser tray condition, clog, dispenser housing | Clogged dispenser, cracked housing, overfilling, detergent residue |
| Inside the drum (front-load) | Door boot gasket condition, glass, pooling location | Torn door boot, clogged boot drain, dispenser leak into drum |
| From underneath during agitation | Tub seal area, center post (top-load), internal hose clamp | Tub seal, center-post seal, internal hose, pump connection |
Supply-hose leaks: the most preventable washer flood
Supply hoses are the number-one cause of washing-machine-related water damage claims. Rubber supply hoses degrade over time, develop bulges, weaken at the fittings and can burst under full household water pressure, even when the washer is off. Insurance-industry and plumbing sources recommend replacing rubber supply hoses every five years and considering braided stainless-steel hoses, which are more resistant to bursting.
Check your supply hoses for:
- Bulging, blistering, cracking or discoloration.
- Moisture, rust or mineral deposits at the fittings.
- Kinks that create stress points.
- Connection looseness at the valve or the washer inlet.
- Age — if you cannot determine when the hoses were installed, treat them as overdue for inspection.
Turn off both supply valves when the washer is not in use if the hoses show any signs of wear. This is especially important in second-floor or upper-level laundry installations where a burst hose can flood multiple levels.
Door-boot leaks on front-load washers
The door boot—the rubber gasket between the door and the tub—is a common leak point on front-load washers. It seals against water during the wash and spin cycles while flexing to accommodate door movement. Over time, the boot can tear from foreign objects, mold, cleaning chemical damage, excessive lint buildup or physical stress from loading heavy items.
Signs of a door-boot leak:
- Water drips from the front of the washer during the wash or rinse cycle.
- Water pools inside the rubber folds of the boot.
- A visible tear, hole, crack or displaced section on the inner surface.
- Mold, mildew or buildup in the boot folds that prevents proper sealing.
A small tear may only leak during high-water or spin portions of the cycle. Inspect the boot by pulling back the folds and looking for cuts, embedded objects or deteriorated rubber.
Oversudsing: not a leak but the same result
Using too much detergent, the wrong type of detergent or non-HE detergent in a high-efficiency washer creates excess suds that can overflow through the door seal, dispenser housing or drain system. The result looks like a leak but is actually a usage problem.
Signs of oversudsing:
- Suds are visible on the floor, around the door gasket or in the dispenser area.
- The washer displays a suds error code.
- The problem occurs only with certain detergent loads and not with plain-water cycles.
High-efficiency washers require HE-labeled detergent and typically use one to two tablespoons per load, not a full cup. Reduce detergent, run an empty hot-water cycle and check whether the leak stops before scheduling service.
Tub-seal leaks on top-load washers
On top-load washers, the tub seal (also called the tub-to-pump seal or center-post seal) prevents water from leaking past the drive shaft where it passes through the bottom of the tub. A failing tub seal drips water beneath the washer during the wash or agitation cycle. This leak is not visible without tilting or accessing the underside of the machine.
Tub-seal failure often develops gradually. The first signs may be a small amount of water under the washer after each load, a damp or corroded area near the motor and pump, or rust-stained water. If the seal has been leaking for a while, the bearing below it may also be damaged.
When Is a Washer Leak Actually a Plumbing Problem?
Distinguishing an appliance leak from a plumbing problem prevents calling the wrong professional.
Signs that the plumbing is the source
- Water overflows from the standpipe during the drain cycle but stops when the washer is off.
- A sink, tub or floor drain in the same area also backs up or drains slowly.
- Water appears at the wall valve or supply connection, not at the washer fitting.
- The leak occurred after plumbing work, drain cleaning or construction in the building.
- The washer drains normally into a bucket or laundry sink but overflows at the standpipe.
A plumber or drain-clearing service typically handles household drain problems. An appliance technician diagnoses the washer.
Signs that the washer is the source
- Water appears during the fill, wash, rinse or spin cycle and stops when the washer is off with valves open.
- The door boot, pump area, dispenser housing or underside of the washer is wet.
- An error code related to water level, overflow, suds or drainage appears.
- The same leak happens regardless of the drain connection used.
What Usually Requires Professional Diagnosis?
If the supply hoses are tight, the standpipe is not backing up, oversudsing has been ruled out and the washer still leaks, the following systems typically require on-site diagnosis.
Drain pump and pump-to-hose connections
A cracked pump housing, failed pump seal or loose hose clamp at the pump-to-drain connection can drip water during the drain cycle. The pump is located inside the cabinet and is not usually accessible without disassembly.
Tub-to-pump hose and internal hoses
Internal rubber hoses connect the tub, pump, recirculation system and dispenser. These hoses can crack, loosen at clamps or develop pinholes over time. Internal-hose leaks can appear intermittently and may only be visible when the washer is running.
Door boot (front-load)
A torn or displaced door boot requires replacement with the correct model-specific part. The boot must seat properly on both the tub and the front panel. Improper installation can cause a worse leak or allow the boot to catch during spin.
Tub seal and bearing (top-load)
A leaking tub seal on a top-load washer may also require bearing replacement because water contamination damages the bearing. This is a labor-intensive repair, and the combined cost of the seal and bearing should be weighed against the appliance’s age and replacement cost.
Inlet valve
The inlet valve controls water flow into the washer. A cracked body, failed internal seal or stuck-open valve can drip continuously or leak during fill. The valve is electrically controlled and connected to the supply hoses. Do not attempt replacement while the water supply is on.
Detergent-dispenser housing
On some models, a cracked dispenser housing, clogged siphon or broken dispenser actuator can cause water to leak from the front of the washer during the fill or rinse portion of the cycle. The dispenser assembly is model-specific.
Staten Island Conditions That Matter
Upper-level laundry installations
Many Staten Island homes, townhouses and condos place the washer on the second floor, in a hallway closet or near a bathroom. A washing machine leaking on an upper level can damage the ceiling, walls and flooring below. Consider a drip pan under the washer, braided stainless-steel supply hoses and an automatic shutoff valve for upper-level installations. These are preventive measures, not substitutes for diagnosing an existing leak.
Basement laundry and storm drainage
Washers in basements can be affected by sewer backup, storm-drain surcharge and heavy-rain events. If the floor drain near the washer is backing up during rain, the problem is likely municipal drainage, not the washing machine. Do not operate the washer in a flooded or actively flooding basement.
Shared plumbing in multi-unit buildings
In older Staten Island apartment buildings, co-ops and condos, the standpipe or drain line serving the washer may be shared with other units or fixtures. Backup in a shared line can appear to be a washer problem but requires a building plumber rather than an appliance technician.
Flooring damage and insurance
Water from a washing machine leaking onto hardwood, laminate or engineered wood causes swelling, warping, mold and subfloor damage. The longer water sits, the worse the damage. Photograph the affected area, note the duration and report to the property owner or insurer promptly. Keep the appliance-repair diagnosis separate from the flooring claim.
Landlord and tenant responsibility
If the landlord installed the washer or provided the hookup, notify the landlord or property manager in writing about the leak and any floor or structural damage. New York guidance says landlord-installed appliances in multiple dwellings must be maintained in good and safe working order. A leak that damages a neighboring unit is typically a building-management and insurance matter.
Winter supply-line and drain-line concerns
In winter, supply hoses routed through unheated spaces or against exterior walls are subject to freezing. A frozen supply hose prevents filling; a frozen drain hose prevents draining and can look like a pump failure. Rubber supply hoses are especially vulnerable because they retain water in low points. If you suspect a frozen line, do not apply open flame. Allow the area to warm gradually and inspect for cracks or burst fittings before restoring water flow.
What to Record Before Requesting Service
- Full brand and model number from the appliance label.
- Front-load or top-load configuration.
- Where the water appears: front, rear, underneath, at the door, at the standpipe.
- When the leak occurs: during fill, wash, rinse, drain, spin or all the time.
- How much water: a drip, a puddle or a significant volume.
- Supply-hose condition and approximate age.
- Whether the detergent is HE-rated and how much is being used.
- Whether the standpipe backs up or other drains are slow.
- Recent plumbing work, washer installation or move.
- Whether a lower level has been affected.
- Warranty, service-contract or recall status.
- Access limits, ownership and building requirements.
Search the exact model at the CPSC recall database and the manufacturer’s support site.
When Should You Stop Checking and Request Diagnosis?
A washing machine leaking after confirming the supply hoses, standpipe and detergent type needs professional diagnosis. Request service promptly when:
- Water appears during the wash or spin cycle from the pump area or underside.
- The door boot has a visible tear, hole or displaced section.
- The leak returns after tightening supply connections.
- Water reaches the power cord, outlet or electrical connections.
- The floor, subfloor or a lower level has been damaged.
- The washer is in an upper-level location and the leak is active.
- An error code related to overflow, water level or drainage persists.
When arranging service, ask:
- Who will handle the appointment and diagnosis?
- What does the diagnostic or service-call fee cover?
- Is the written option itemized for parts, labor, tax and other charges?
- Will the technician evaluate the supply connections and internal components?
- Is a return visit expected if a model-specific part is required?
- What repair and warranty terms will be provided in writing?
Request Leak Diagnosis
Repair or Replace a Leaking Washing Machine?
The answer depends on the failed component. A supply-hose replacement, a clamp tightening or a dispenser fix is a different financial decision from a tub seal, bearing, door boot or pump housing. A tub-seal-and-bearing repair on an aging top-load washer often approaches the replacement cost, making the comparison essential.
Consider the quoted repair, part availability, appliance age, repeat history, the replacement cost including delivery, haul-away, hookup and whether the replacement fits the existing connections and space.
Compare both paths → /resources/repair-or-replace-appliance/ Understand quote components → /resources/appliance-repair-cost-staten-island/
Get Help With a Washing Machine Leaking in Staten Island
If you have turned off the water, checked the supply hoses, confirmed the detergent type and ruled out a standpipe backup, request a model-aware diagnosis. Describe where the water appears, when it appears, how much and whether the floor or a lower level is affected. Confirm appointment availability, diagnostic terms, provider scope and written authorization before work begins.
Phone hours: 8:00 a.m. to 5:00 p.m. daily.
Washer service overview → /services/washer-repair/ Drain problems → /resources/washer-not-draining/ Spin problems → /resources/washer-not-spinning/ How the visit works → /how-it-works/ Service-area review → /service-areas/