
Refrigerator Leaking Water? Find the Source Before Mopping It Up
Water around a refrigerator does not always come from inside the appliance. A refrigerator leaking onto the floor can involve a defrost drain, a water supply connection, an ice-maker line, a drain pan, a door seal, condensation or a household plumbing source that has nothing to do with the refrigerator itself. Before you pull the unit out or call for service, identify what the water looks like, where it appears first and when it started.
Finding the source matters because the repair path for a clogged defrost drain is different from the path for a cracked water-supply line, and both are different from a condensation pattern caused by a humid kitchen or a failed door gasket. The right information keeps the floor safe, protects the appliance and shortens the diagnostic appointment.
For help arranging refrigerator leak diagnosis in Staten Island, tell us the brand, model number, where the water appears and whether it is near an electrical connection. Appointment availability, the business handling the visit, diagnostic terms and repair scope should be confirmed before the appointment.
Request Refrigerator Service
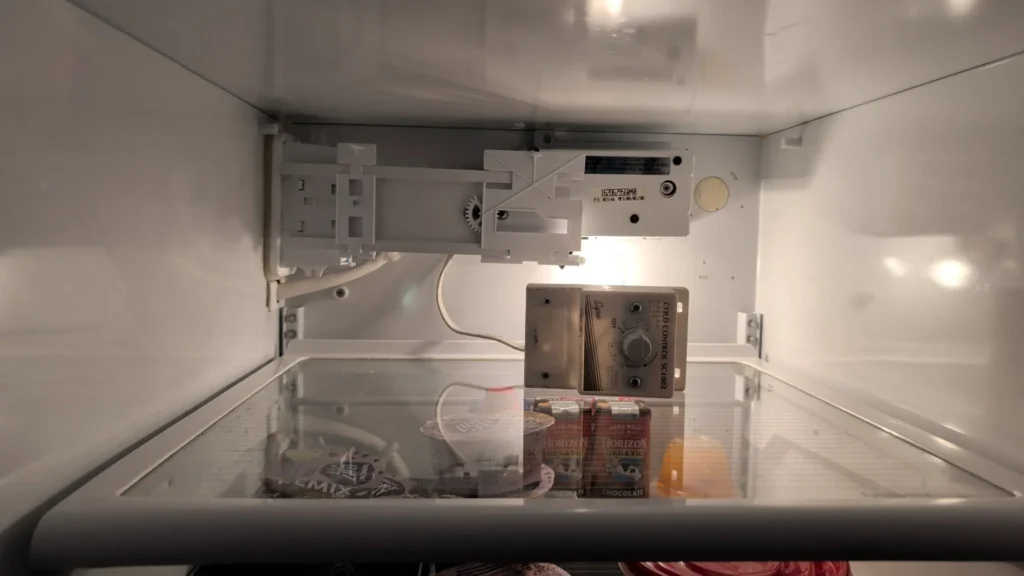
Stop and Protect: What to Do Before Looking for the Source
A refrigerator leaking water can damage flooring, cabinetry, walls and the subfloor beneath. In some situations it can also create an electrical hazard. Use this order before you investigate the origin.
- Check for electrical danger first. If water has reached the power cord, outlet, junction box or any exposed wiring, do not step into it, touch the appliance or pull the plug while standing in water. Turn off the circuit at the breaker panel if you can do so safely, and get qualified electrical help.
- Contain the water. Use towels or a shallow pan to keep water from spreading to adjacent flooring or a lower level. On hardwood, laminate or engineered flooring, standing water causes damage quickly.
- Protect belongings near the refrigerator. Move rugs, boxes, pet bowls and anything else on the floor that absorbs water.
- Note the timing. Write down when you first saw water, whether the refrigerator has been running normally, and whether water appeared during a defrost cycle, after a grocery load, overnight, during a storm or after recent plumbing or filter work.
- Take photos. Photograph the water location, extent, color, the area under and behind the refrigerator if safely visible, the supply connection and the refrigerator display before you do anything else.
Do not pull a heavy, water-connected refrigerator away from the wall until you have turned off the water-supply valve and confirmed that the power cord and floor are safe. Sliding or pulling can strain the water line, damage flooring, kink a copper tube or break a plastic fitting.
Refrigerator Leaking: Match the Location to the Likely Source
The location and appearance of the water often narrow the source faster than removing parts. These observations help define a diagnostic path, but none confirms a failed component by itself.
| Where the water appears | What to look at safely | Possible sources to evaluate |
|---|---|---|
| Front of the refrigerator on the floor | Door gasket condition, bin or drawer overfill, dispenser drip tray | Door seal, condensation, overfilled drip tray, tilted installation |
| Under the front, toward the center | Drain pan visibility if accessible, bottom grille area, humidity | Drain pan crack, overflow or misalignment; defrost-drain overflow |
| Under the refrigerator toward the rear | Water-supply shutoff valve area, water-line connection, floor condition | Water-supply connection, inlet valve, water line, defrost drain path |
| Inside the fresh-food section, bottom | Crisper area, rear wall, drain opening below crisper cover | Clogged or frozen defrost drain, cracked drain tube, blocked drain path |
| Inside the freezer compartment | Ice around the bottom or rear wall, drain hole or channel | Frozen defrost drain, ice buildup redirecting melt water |
| Around the ice maker or water dispenser | Dispenser housing, ice-maker fill area, water filter housing | Fill valve, water-line connection, filter seat, cracked housing |
| Behind the refrigerator (wall or floor) | Visible supply hose or copper tube, shutoff valve, wall surface | Supply-line fitting, valve, crimped or corroded line, household plumbing |
Is the water from inside the refrigerator or from the supply line?
This is the most important first question. Water pooling inside the fresh-food compartment, below the crisper bins or leaking from the freezer floor almost always involves the defrost drainage system. Water appearing behind the unit, at the wall connection, around the shutoff valve or near the floor beneath the rear usually involves the water supply, filter or inlet system.
If you have no ice maker or water dispenser and the refrigerator is not connected to a water line, the source is either internal drainage, condensation or an external plumbing coincidence.
What does a defrost-drain leak look like?
Most frost-free refrigerators collect defrost melt water and route it through a drain tube to a pan near the compressor, where it evaporates. When the drain path is clogged, frozen or cracked, water backs up into the fresh-food compartment, pools under the crisper drawers or drips down the interior rear wall. The water is typically clear and may contain small food particles that entered the drain opening.
Signs that the defrost drain may be involved:
- Water collects under the crisper bins, on the bottom shelf or along the rear interior wall.
- Ice forms around a visible drain opening or along the bottom rear of the freezer.
- The leak seems to follow the defrost cycle and may appear intermittently rather than constantly.
- The fresh-food section may smell stale because standing water has accumulated.
Do not probe a frozen drain with a sharp tool, pour boiling water into the drain or use a hair dryer near a wet interior without understanding the model layout. Some defrost drains are accessible; others require rear-panel removal, and forcing them can crack plastic, damage a heater element or push debris further into the tube.
What does a supply-line leak look like?
A water-supply leak usually appears behind or beneath the rear of the refrigerator. It may be constant, appear when the ice maker fills, or become noticeable only after someone pushes the unit back and stresses a fitting.
Signs that the water supply may be involved:
- Water appears at or near the shutoff valve, the wall connection or the line entering the back of the refrigerator.
- The leak worsens when the ice maker fills or the dispenser runs.
- The water line is visibly kinked, corroded, bulging or discolored.
- You find a damp or stained wall, baseboard or floor behind the refrigerator.
Turn off the dedicated water-supply valve before pulling the refrigerator forward. If the valve does not close fully, is corroded or leaks when turned, the valve itself may need replacement by a plumber before the appliance connection can be evaluated.
What does a door-seal or condensation leak look like?
Warm, humid air entering through a damaged or displaced gasket can produce condensation on cold interior surfaces or visible moisture around the door frame. This pattern is often subtle and seasonal, worsening in summer when indoor humidity is higher.
Signs that condensation or a door-seal problem may be involved:
- Moisture, droplets or a thin water film appears on the outer door surface, the door frame or interior walls near the top.
- The gasket is torn, folded, displaced, compressed or visibly not making full contact.
- The refrigerator is near a heat source, dishwasher steam, direct sunlight or a consistently humid room.
- The leak seems worse in hot or humid weather.
Clean the gasket and contact surface using the manufacturer-approved method. A paper-slip test can suggest a weak seal, but it does not diagnose every gasket, hinge or alignment problem on every model.
When Is a Refrigerator Leak Not an Appliance Problem?
Not every puddle near a refrigerator belongs to the appliance. Before assuming the refrigerator is the source, check:
- Household plumbing. A supply valve, wall fitting, pipe joint or adjacent sink connection can leak onto the same floor. If you see water at the wall, around a valve body or at a plumbing joint that is not part of the refrigerator, a plumber may be needed rather than an appliance technician.
- Dishwasher or sink drain. In some kitchens the dishwasher drain hose, garbage disposal connection or under-sink plumbing is routed near or behind the refrigerator. Water from those sources can travel along the floor.
- Condensate from a nearby air-conditioning unit, window unit or dehumidifier. Condensate lines and drip pans can overflow, especially in summer.
- A spill, pet water bowl or defrosted food. Simple explanations are common.
If the source is clearly external, the refrigerator may not need service at all. If the source is unclear, photograph both the appliance connection area and the surrounding plumbing before calling.
Safe Checks You Can Make Without Moving the Refrigerator
Inspect the front and visible floor
Look at the water pattern. Front-center water often points to the defrost drain or drain pan. Side water near a dispenser may point to the dispenser drip tray. Rear water may involve the supply line. Record the color, clarity and approximate volume.
Check the interior compartments
Open the fresh-food section and look beneath the crisper drawers and along the rear wall. Lift the bins carefully. If water or ice is sitting in the bottom, the defrost drain path is the first system to evaluate. Check the freezer floor for an ice dam or frost ring near the drain area.
Look at the dispenser and ice-maker area
If the refrigerator has a water dispenser, check the drip tray beneath it. Some trays overflow when not emptied. Look at the ice-maker bin for standing water, melted ice or a fill line that is dripping.
Find and check the water-supply valve
The shutoff valve is usually on the wall behind or beside the refrigerator, under the sink or in an adjacent cabinet. Without moving the appliance, check whether the valve body or accessible fitting is wet. If you can see the water line between the wall and the rear of the refrigerator, look for drips, kinks, corrosion or swelling.
Check the drain pan if it is accessible
Some models have a removable drain pan accessible through the bottom front grille. If the manual shows the pan location, inspect it for cracks, overflow or misalignment. Do not remove panels that require tools, disassembly or access under a running compressor.
What Usually Requires Professional Diagnosis?
If the safe checks do not identify a clear, simple cause, the following systems typically require on-site diagnosis.
Defrost drainage system
The defrost drain tube, trough, heater, panel and drain path are model-specific. A frozen drain often has a root cause—a defrost system fault, a failed heater or sensor, a misrouted tube or repeated moisture entry. Simply clearing the ice without diagnosing why it froze creates a repeating problem.
Water inlet valve and fill system
The inlet valve opens to fill the ice maker or supply the dispenser. A stuck, cracked or failed valve can drip continuously or leak during fill cycles. The valve is electrically controlled and water-connected. Do not disassemble it while the water supply and power are on.
Ice-maker components
Ice-maker leaks can involve the fill cup alignment, the water-inlet tube, a cracked mold, a faulty fill valve or an overfill condition. Ice makers vary widely between brands and configurations. Removing or adjusting ice-maker parts incorrectly can cause a worse leak or damage the compartment.
Door gasket and hinge alignment
A failed gasket, worn hinge, sagging door or misaligned cabinet can allow humid air entry, produce condensation and contribute to drainage and frost problems. Replacement gaskets must match the exact model, and hinge adjustment on a loaded door requires proper procedure.
Sealed-system or evaporator leak
In rare situations, a leak may involve a corroded evaporator or a sealed-system component. These leaks can produce an oily residue mixed with refrigerant. Sealed-system diagnosis requires pressure testing and qualified personnel who meet EPA Section 608 certification requirements for handling regulated refrigerants. This is not a homeowner repair.
Staten Island Conditions That Change the Next Step
Summer humidity and condensation
Staten Island summers can be warm and humid. Indoor humidity above 60 percent increases condensation on cold refrigerator surfaces, especially if the door gasket is weak, the kitchen lacks ventilation, or the refrigerator is near a dishwasher, stove or exterior door that is frequently opened. Condensation alone is not a component failure, but persistent condensation can mask a gasket, drain or airflow problem.
Coastal storms, flooding and power loss
If the refrigerator was exposed to floodwater or storm surge, do not energize it. Flooded electrical equipment can create shock, short-circuit and fire hazards even after the water recedes. Arrange evaluation by the appropriate qualified professional. Notify the insurer, property owner or building manager as relevant. Food or packaging contacted by floodwater requires separate official food-safety handling.
After a power outage, a defrost cycle runs when the unit restarts. Temporary dripping from condensation or defrost melt during recovery is normal and should stop within a few hours. If it continues, the drain path may be blocked.
Apartment, condo and co-op considerations
Before pulling a refrigerator from its position or authorizing water-line work, determine who owns the appliance and who is responsible for the water connection under the lease, building rules or warranty. If the landlord installed the refrigerator or the water supply is a building fixture, give the owner or manager written notice and keep a copy.
Tell the scheduler about elevator restrictions, floor-protection rules, certificates of insurance, building hours and tight galley-kitchen access. A leaking supply line that has damaged flooring or a downstairs unit may also be a building-management and insurance matter.
Flooring damage
Water from a refrigerator leaking onto hardwood, laminate, engineered wood, vinyl plank or tile with wood underlayment can cause swelling, warping, mold or subfloor damage. The longer water sits, the worse the damage. Document the affected area with photographs, note the duration and report to the property owner or insurer promptly. Flooring repair and appliance repair are usually separate scopes of work.
What to Record Before Requesting Service
The right information shortens the path from “water on the floor” to a testable problem.
- Full brand and model number from the appliance label—not the badge on the door.
- Where the water appears: inside the fresh-food section, inside the freezer, under the front, under the rear, at the wall connection or at multiple locations.
- When the leak started and whether it is constant or intermittent.
- Whether the refrigerator has a water line, ice maker or dispenser.
- Whether any recent work was done: filter change, plumbing, appliance move, remodel or floor work.
- Whether the leak changed after a storm, power outage or defrost cycle.
- The condition of the floor and whether lower-level damage is possible.
- Any display message or error code, photographed before reset.
- Warranty, service-contract or recall status.
- Access limits, ownership, building requirements and tenant/landlord responsibility.
Search the exact model at the CPSC recall database and the manufacturer’s support site. Some refrigerator models have been recalled for water-system defects. A brand match alone is not enough; recall notices identify specific model and serial ranges.
When Should You Stop Checking and Request Diagnosis?
A refrigerator leaking that has not been explained by a simple spill, an overfilled drip tray, a dispenser overflow or a household plumbing source usually needs professional diagnosis. Request service promptly when:
- Water reaches or pools near the power cord, outlet or any electrical connection.
- The leak returns after you clean it up, especially if it follows a defrost cycle.
- Ice repeatedly builds up inside the freezer or around an interior drain.
- The water-supply line, valve or connection is wet and you cannot safely tighten or isolate it.
- The floor, cabinetry or a lower unit has been damaged.
- The appliance was exposed to floodwater.
- You see an oily residue, discolored water or an unfamiliar chemical odor near the appliance.
Do not replace a water line, inlet valve, defrost heater or drain tube based only on an online description. Parts are model-specific, and several faults can produce water in the same location.
When arranging service, ask:
- Who will handle the appointment and diagnosis?
- What does the diagnostic or service-call fee cover?
- Is the written option itemized for parts, labor, tax and other charges?
- Will the technician evaluate both the appliance and the water connection?
- Is a return visit expected if a model-specific part is required?
- What repair and warranty terms will be provided in writing?
Request Leak Diagnosis
Repair or Replace a Leaking Refrigerator?
The answer depends on the cause, not the symptom. A clogged defrost drain is a different financial decision from a corroded evaporator, a cracked cabinet liner or a failed sealed-system component. First identify the failure, then compare the complete repair with a suitable installed replacement.
Consider the quoted repair cost, part availability, repeat-failure history, age and cabinet condition, remaining warranty, replacement fit, delivery, haul-away, water connection, cabinetry and downtime. A recurring leak that has already damaged flooring may add urgency, but the decision still depends on the diagnosis.
Compare both paths → /resources/repair-or-replace-appliance/ Understand quote components → /resources/appliance-repair-cost-staten-island/
Get Help With a Refrigerator Leaking in Staten Island
If you have contained the water, checked the accessible areas and cannot identify a simple external cause, request a model-aware diagnosis. Describe where the water appears, when the leak started, whether the refrigerator has a water line and whether water is near any electrical connection. Confirm appointment availability, diagnostic terms, provider scope and written authorization before work begins.
Phone hours: 8:00 a.m. to 5:00 p.m. daily.
Refrigerator service overview → /services/refrigerator-freezer-repair/ Cooling problems → /resources/refrigerator-not-cooling/ How the visit works → /how-it-works/ Service-area review → /service-areas/